|
Erica Biery demonstrated her glass stamping technique for us on the second part of day 1 at SlumpFest. It is a fairly straight forward technique, but has some great looking results. The steps are listed under each picture. Once you have stamped your piece it remains liquid. You could gently rub mica on it, or if you don't like the way it came out you can spray on 91% rubbing alcohol to clean off your glass. When you are ready to make your stamp permanent use the following schedule.
Once finished be sure to clean up all tools with the rubbing alcohol, you can then let the equipment soak in soapy water for a bit before drying everything off. Leftover stamping enamel, because it remains liquid, can be saved for future use. |
||||||||||
|
|||||||||||
|
|||||||||||
|
|||||||||||
|
|||||||||||
|
Tuesday, December 3, 2013
Slumpfest Project 2: Stamping Glass


Monday, October 28, 2013
Slumpfest Project 1: Promising start, unwanted results
|
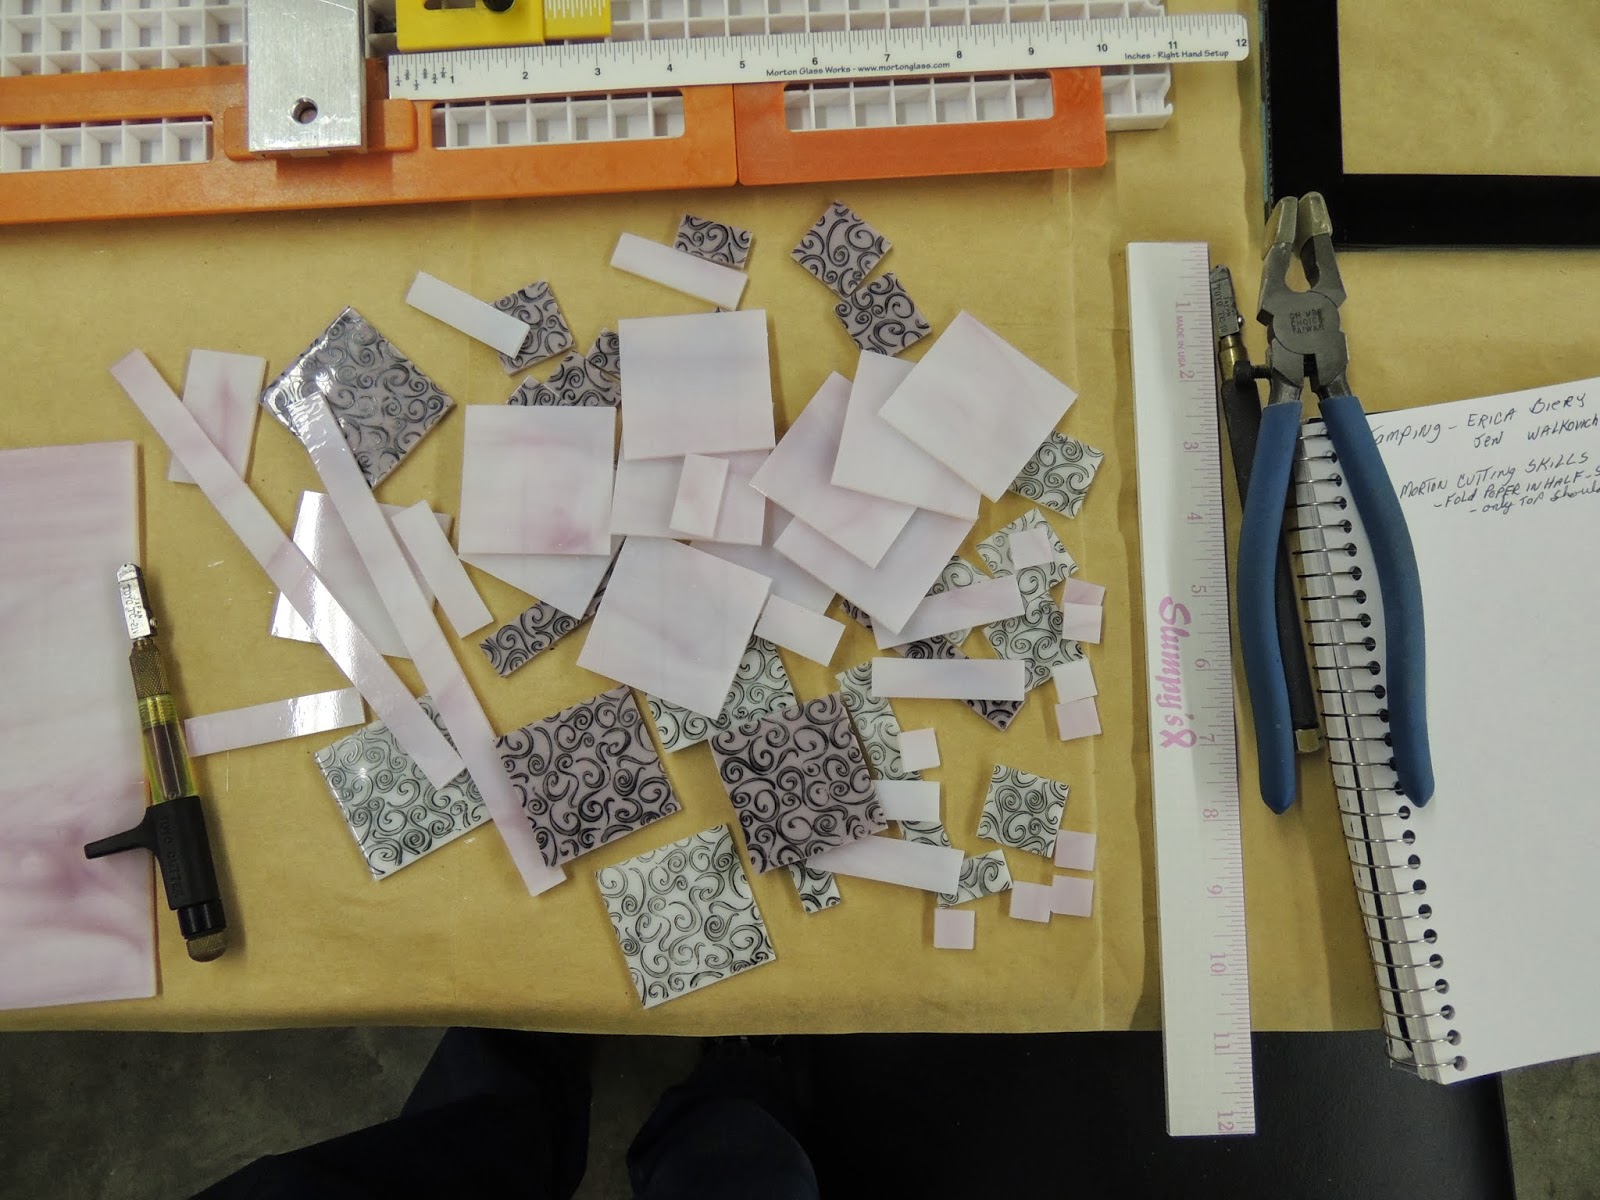
To start off Erica Biery's class we had a bit of a warm up on the Morton portable glass system. I did learn that my kit is missing a number of newer items that make life a bit easier when cutting geometrical shapes. No worries, I had ordered the beetle bits system the week before. I can use either at this point. The project was to be a salad bowl using some stamped glass that she and Jen Walkovich had prepared the day before. We were due to learn stamping later in the day. So I picked out a couple stamped pieces and a matching glass that Spectrum Glass had kindly donated to the class and started cutting away. I just went ahead and did various sizes. The salad bowl project works as a mosaic analog. After cutting my pieces I cut a black border for my 12" X 12" glass and started to place my pieces on it upside down. The reason to place everything upside down was that it would keep the stamped glass pieces looking a bit sharper. We were working at a hectic pace, everyone was sharing a cutting system and there were a lot of pieces to cut. As they said, "This isn't your masterpiece, its just to show the technique." Once I arranged everything as best as I could we tacked it down with some cheap hairspray in drops. Next we took some fine black frit and filled in the empty spaces. This took a little work to make sure we didn't have any stray pieces where we didn't want them. Then to preserve it all we sprayed the hairspray over the whole piece. I transported mine home to fuse. I had to fix a few areas that shifted, but it worked well enough. I did a full fuse, then flipped the piece and did another full fuse. I had some really nice results. I little spare frit where I didn't want it, but it was nice enough. Then I did my slump fuse. I'd not slumped something with such sharp sides before so I thought I was doing a good thing adjusting my slump schedule. As you can see in the last picture, it slumpped itself down the sides of the mold. *Sigh*. I'm not sure if there is any saving grace here, but I may try to do a full fuse to flatten it and see what comes out of it. Here is the disastrous schedule I used. My Schedule:
I had based it off of a new slump schedule I saw published by spectrum:
Next time I will go with what was my normal slump schedule, that I had gotten from Spectrum a while back.
|
||||||||||||||||||||||||||||||||||||||||||||||||||||||||||||||||||||||||||
|
|||||||||||||||||||||||||||||||||||||||||||||||||||||||||||||||||||||||||||
|
|||||||||||||||||||||||||||||||||||||||||||||||||||||||||||||||||||||||||||
|
|||||||||||||||||||||||||||||||||||||||||||||||||||||||||||||||||||||||||||
|
|||||||||||||||||||||||||||||||||||||||||||||||||||||||||||||||||||||||||||
|


Sunday, October 27, 2013
Do you have any Hunny?
We have had 2 little girls visiting with us all the past week, ages 6 moths and 3 years. The 3 year old has a big stuffed Eeyore that she likes to sleep with. We also read pooh stories, and she loves when I sing the Tigger song. So Friday night, I decided I'd like to make a little project for them before they head home on Monday.
I used some blue glass and white iridized glass I had on hand to cut out a honey pot. I then cut a lid shape from the blue and a small handle for the lid from adventurine black. Luckily I had some black stringer on hand. I nipped off small pieces, stole my wife's tweezers and spelled out HUNNY in block letters. I dropped Bullseye GlasTac firing glue on it to keep it in place and left it to dry.
Saturday I added a piece of wire between 2 layers, so that it could be hung then I set it to contour fuse at 1400. It ended up a little more flat than I was going for, but the letters are still raised. Next time I will try a temperature closer to a tack, perhaps that will give me what I wanted. For a first run, I'm happy.


Wednesday, October 23, 2013
SlumpFest2103
Last weekend I had the opportunity to attend SlumpFest2013 held at Slumpy's in Belmont, NC. It was a hard drive down after work on Friday and then back home Sunday after having classes for the day. I had surgery for a hernia scheduled for Monday morning so I couldn't take an extra day to make it easier on me. The surgery went well and I'm recovering now.
Slumpy's is located in a 100 year old former textile building. It was absolutely huge! We got to be there for the ribbon cutting ceremony to the new showroom, which was nicely put together with many example pieces to look at.
I got to learn two main techniques, glass stamping and crackle glass. I will outline those processes in my next two blog posts. For now here are some highlights from the store.
 |
| SlumpFest Participants and Staff |
 |
| Slumpy's owners ribbon cutting |
 |
| Left over signage from the textile mill |
 |
| This is only a fraction of the space they have available |
 |
| Kiln casted face |
 |
| Kiln casted torso |
 |
| Molds with example pieces |

Monday, September 30, 2013
Houston, we have a problem, and its name is Brian
Today's kiln opening is bound to provide a number of lessons for me. Once I can figure them out.
I purchased a ColourDeVerre pattern fuser mold a couple months back and decided to try it out yesterday. I broke out the frit and started filling the piece with fine frit. My wife came down after a bit and helped out spreading frit around while we tried to figure out the best way to make sure each little detail was filled with enough frit to do the job. Finally, I cut a clear piece to cap off the mold and placed it in the kiln. I used the recommended firing schedule:


I purchased a ColourDeVerre pattern fuser mold a couple months back and decided to try it out yesterday. I broke out the frit and started filling the piece with fine frit. My wife came down after a bit and helped out spreading frit around while we tried to figure out the best way to make sure each little detail was filled with enough frit to do the job. Finally, I cut a clear piece to cap off the mold and placed it in the kiln. I used the recommended firing schedule:
| Segment | Ramp | Tempurate | Hold |
| 1 | 100ºF/55ºC | 300ºF/150ºC | 30 min |
| 2 | 150ºF/85ºC | 1250ºF/675ºC | 30 min |
| 3 | 150ºF/85ºC | 1400ºF/760-765ºC | 5 min |
| 4 | AFAP | 960ºF/515ºC | 60 min |
| 5 | 100ºF/60ºC | 600ºF/315ºC | Off, No Venting |
I was more than a little surprised when I opened the kiln and found this.


My impressions as to what went wrong are as follows:
Bubble:
The directions say the fill weight is between 900-1,000 grams of glass. Note to self, if I'm going to mess with frit buy an electronic scale just for glass. I did not measure the fill weight, I winged it. We went with what looked to be full. I'm not sure how much more full we could have gotten it. Each of the little channels were holding as much as they possibly could. The edge could have used some more frit, but I figured I could cut it off if it didn't work for me. In any case, the bubble is most likely not enough glass. I am kicking myself for not having taken a loading the kiln picture.
Cracked Glass:
It could be that the firing schedule just was not right, but I doubt it would be that off. It could be possible that the firing schedule was thrown by insufficient glass in the mold. The cracked glass could also have to do with the next issue.
Glass Stuck to the Mold:
The company only recommends preparing the mold with MR-97. I tend to take instructions like that as a push to sell more product. In truth, I don't know if they have any affiliation with it whatsoever. I used my normal kiln wash and then to be extra careful sprayed on High Temp 1800, which also uses boron nitrate as its mechanism. I figured with both kiln wash and boron nitrate I was golden. Not so much, apparently.
We had also tried to use a straight edge to run across the top to make sure the lines were distinct. It is possible that this scrapped off the release agent from the mold causing it to stick.
Take Away:
There are too many issues with this piece to say what exactly happened. It is highly likely that had I followed directions to the letter, I would have come out smelling of roses.
I have a tendency to wing it and see what happens, but with items like this, I should be much more conservative. $65 mold gone with the wind.
Wednesday, September 11, 2013
New take on a broken plate
  |
When I was first learning fused glass we made broken plates. You take a hammer and break a pieces of glass up and then arrange them on another piece of glass and fuse (bottom two images). I decided to do something different than your traditional broken plate and make some purposeful, semi-random cuts in a piece of swirled glass. I then plated them on a larger piece of glass and tack fused it. I then spread some medium frit in the empty spaces and did a little longer of a tack fuse. Next I slumped it in a gentlly sloped plate mold. I really like the flow of the swirls offset by the straight lines and texture of the frit. |

|

|
Sunday, September 8, 2013
Delayed Wedding Present


I finally gave in and bought weave bars so I could do an actual weaved plate, instead of a faux one. A couple friends of mine got married last April and I had not completed their present at that time. I was actually waiting for the weave bars to ship at that point. Before I knew it summer house projects took me away and I had not gotten back to this project until August of this year. So here you have it, my first weaved plate made with iridized blue, red, and blue glass.
Christmas 2012 projects
   |
Saturday, September 7, 2013
Catching up
        |
I haven't been keeping up with the blog as often as I would like. I am hoping that I have the time and fortitude to do that going forward. My experiences of this past summer have led me to revelations about myself and my relationship with glass. In July, I spent a week blowing glass with a group of artists at the Pittsburgh Glass Center in a class taught by Ed Schmid and assisted by Ben Johnson. It was the hottest week of this year. The ambient temperature in the hot shop was 120 degrees, and I'm not talking about directly in front of the furnace. It was a tough week physically to get through. I know I came close to heat stroke at least once that week and had to call it a day. I learned a lot that week. My fellow artists were some of the most supportive/creative people I've had the pleasure to meet. What I discovered is that although I've had an interest in glass for the past 16 years of my life, I had not really had a passion for it. This class, the people and the physical struggle of getting through the class awoke the passion in me that must have been waiting just under the surface. Up until this point, I had made my glass items for myself, or to give away as presents or to donate for charities to auction off. I've not wanted to create an inventory of items because of the expense and fear that they may not sell. That is going to change starting now, well starting about a month ago. There are so many techniques that I want to explore and ways of manipulating glass that I want to try to gain mastery in that in order to finance all of this exploration and improvement in my technique, I am going to start making glass items to sell. I am going to pursue my fused glass, flame worked glass, blown glass, and the occasional stained glass simultaneously. Within the next 4 months or so I am going to open a web site with my glass and start selling on Etsy. I will also, once I reach a critical mass of inventory, start doing the occasional craft show. Who knows, I may try to enter some art contests. I will provide updates as I go along. In the mean time, to the left are items I made during my one week intensive class in July. |
Wednesday, July 24, 2013
Life Changing Experience
I will write more about this later once it all congeals in my mind. Here is my recent post to FB and G+:
Last week's intensive glass class is proving to have been a crucible, figuratively and literally, for me. I see my life in more focus than I ever have before. I know my goals for myself, my family, my work and have a passion for all that is intensified beyond what I thought I was capable of feeling. It's really sad in a way that it has taken 44 years of my life to feel like I do now. I always thought this type of passion was for other people. I'm overjoyed to know that I can share in this deep passion for life. I guess it was just always under the surface waiting to rise up. #LifeChangingEvent
Wednesday, May 1, 2013
First attempts at flameworking
My wife and I took a 4 week class in flameworking that just recently ended. I thought I'd share my first attempts at pendants. Enjoy!


Subscribe to:
Comments (Atom)